Getting Started
This quickstart walks you from zero to a running graph-powered Azure Functions application in a few minutes.
By the end, you will have:
- a graph definition with two nodes
- a Durable Functions orchestrator that executes the graph
- HTTP endpoints for starting runs and polling status
Who this is for
This page is for teams using the Azure Functions Python v2 programming model
(func.FunctionApp() and decorators) with Durable Functions.
Prerequisites
Before starting, make sure you have:
- Python 3.10 or newer.
- An Azure Functions Python v2 app structure with Durable Functions extension.
- Dependencies installed:
azure-functionsazure-functions-durableazure-functions-durable-graphpydanticv2.
See Installation for version details.
host.json
Your host.json must include the Durable Functions extension bundle. See the
host.json in the project root for a working example.
Step 1: Define your state model
Create a Pydantic model that represents the state flowing through your graph:
from pydantic import BaseModel


class TicketState(BaseModel):
    user_message: str
    category: str | None = None
    response: str | None = None
Step 2: Define node handlers
Each node is a function that receives the current state and returns updates:
def classify(state: TicketState) -> dict:
    text = state.user_message.lower()
    category = "billing" if "invoice" in text else "general"
    return {"category": category}


def respond(state: TicketState) -> dict:
    return {"response": f"Handling your {state.category} request."}
Step 3: Build the graph manifest
Use ManifestBuilder to declare the graph topology:
from azure_functions_durable_graph import ManifestBuilder

builder = ManifestBuilder(graph_name="ticket_router", state_model=TicketState)
builder.set_entrypoint("classify")
builder.add_node("classify", classify, next_node="respond")
builder.add_node("respond", respond, terminal=True)

registration = builder.build()
Step 4: Create the Function App
Wire the registration into DurableGraphApp:
from azure_functions_durable_graph import DurableGraphApp

runtime = DurableGraphApp()
runtime.register_registration(registration)
app = runtime.function_app
Save this as function_app.py — the standard entry point for Azure Functions Python v2.
Step 5: Run your app locally
Start your Azure Functions host as you normally do for local development:
The following endpoints will be available:
POST /api/graphs/ticket_router/runsGET /api/runs/{instance_id}GET /api/healthGET /api/openapi.json
Step 6: Test with curl (start a run)
curl -i -X POST http://localhost:7071/api/graphs/ticket_router/runs \
  -H "Content-Type: application/json" \
  -d '{"input": {"user_message": "I need help with my invoice"}}'
The response includes Durable Functions status URLs for polling the run.
Step 7: Check run status
Use the statusQueryGetUri from the start response, or:
Expected response:
{
  "instance_id": "...",
  "runtime_status": "Completed",
  "output": {
    "graph_name": "ticket_router",
    "state": {
      "user_message": "I need help with my invoice",
      "category": "billing",
      "response": "Handling your billing request."
    }
  }
}
Step 8: Understand the execution flow
sequenceDiagram
    participant Client
    participant HTTP as HTTP Endpoint
    participant Orch as afdg_orchestrator
    participant Act as Activities

    Client->>HTTP: POST /api/graphs/ticket_router/runs
    HTTP->>Orch: Start orchestration
    Orch->>Act: afdg_execute_node("classify", state)
    Act-->>Orch: updated state
    Orch->>Act: afdg_resolve_route("classify", state)
    Act-->>Orch: RouteDecision(next="respond")
    Orch->>Act: afdg_execute_node("respond", state)
    Act-->>Orch: updated state
    Orch->>Act: afdg_resolve_route("respond", state)
    Act-->>Orch: RouteDecision(complete)
    Orch-->>Client: final state
The
Activitiesparticipant maps to the concrete activity triggersafdg_execute_node,afdg_resolve_route, andafdg_apply_event.
Step 9 (optional): Verify in Azure Portal
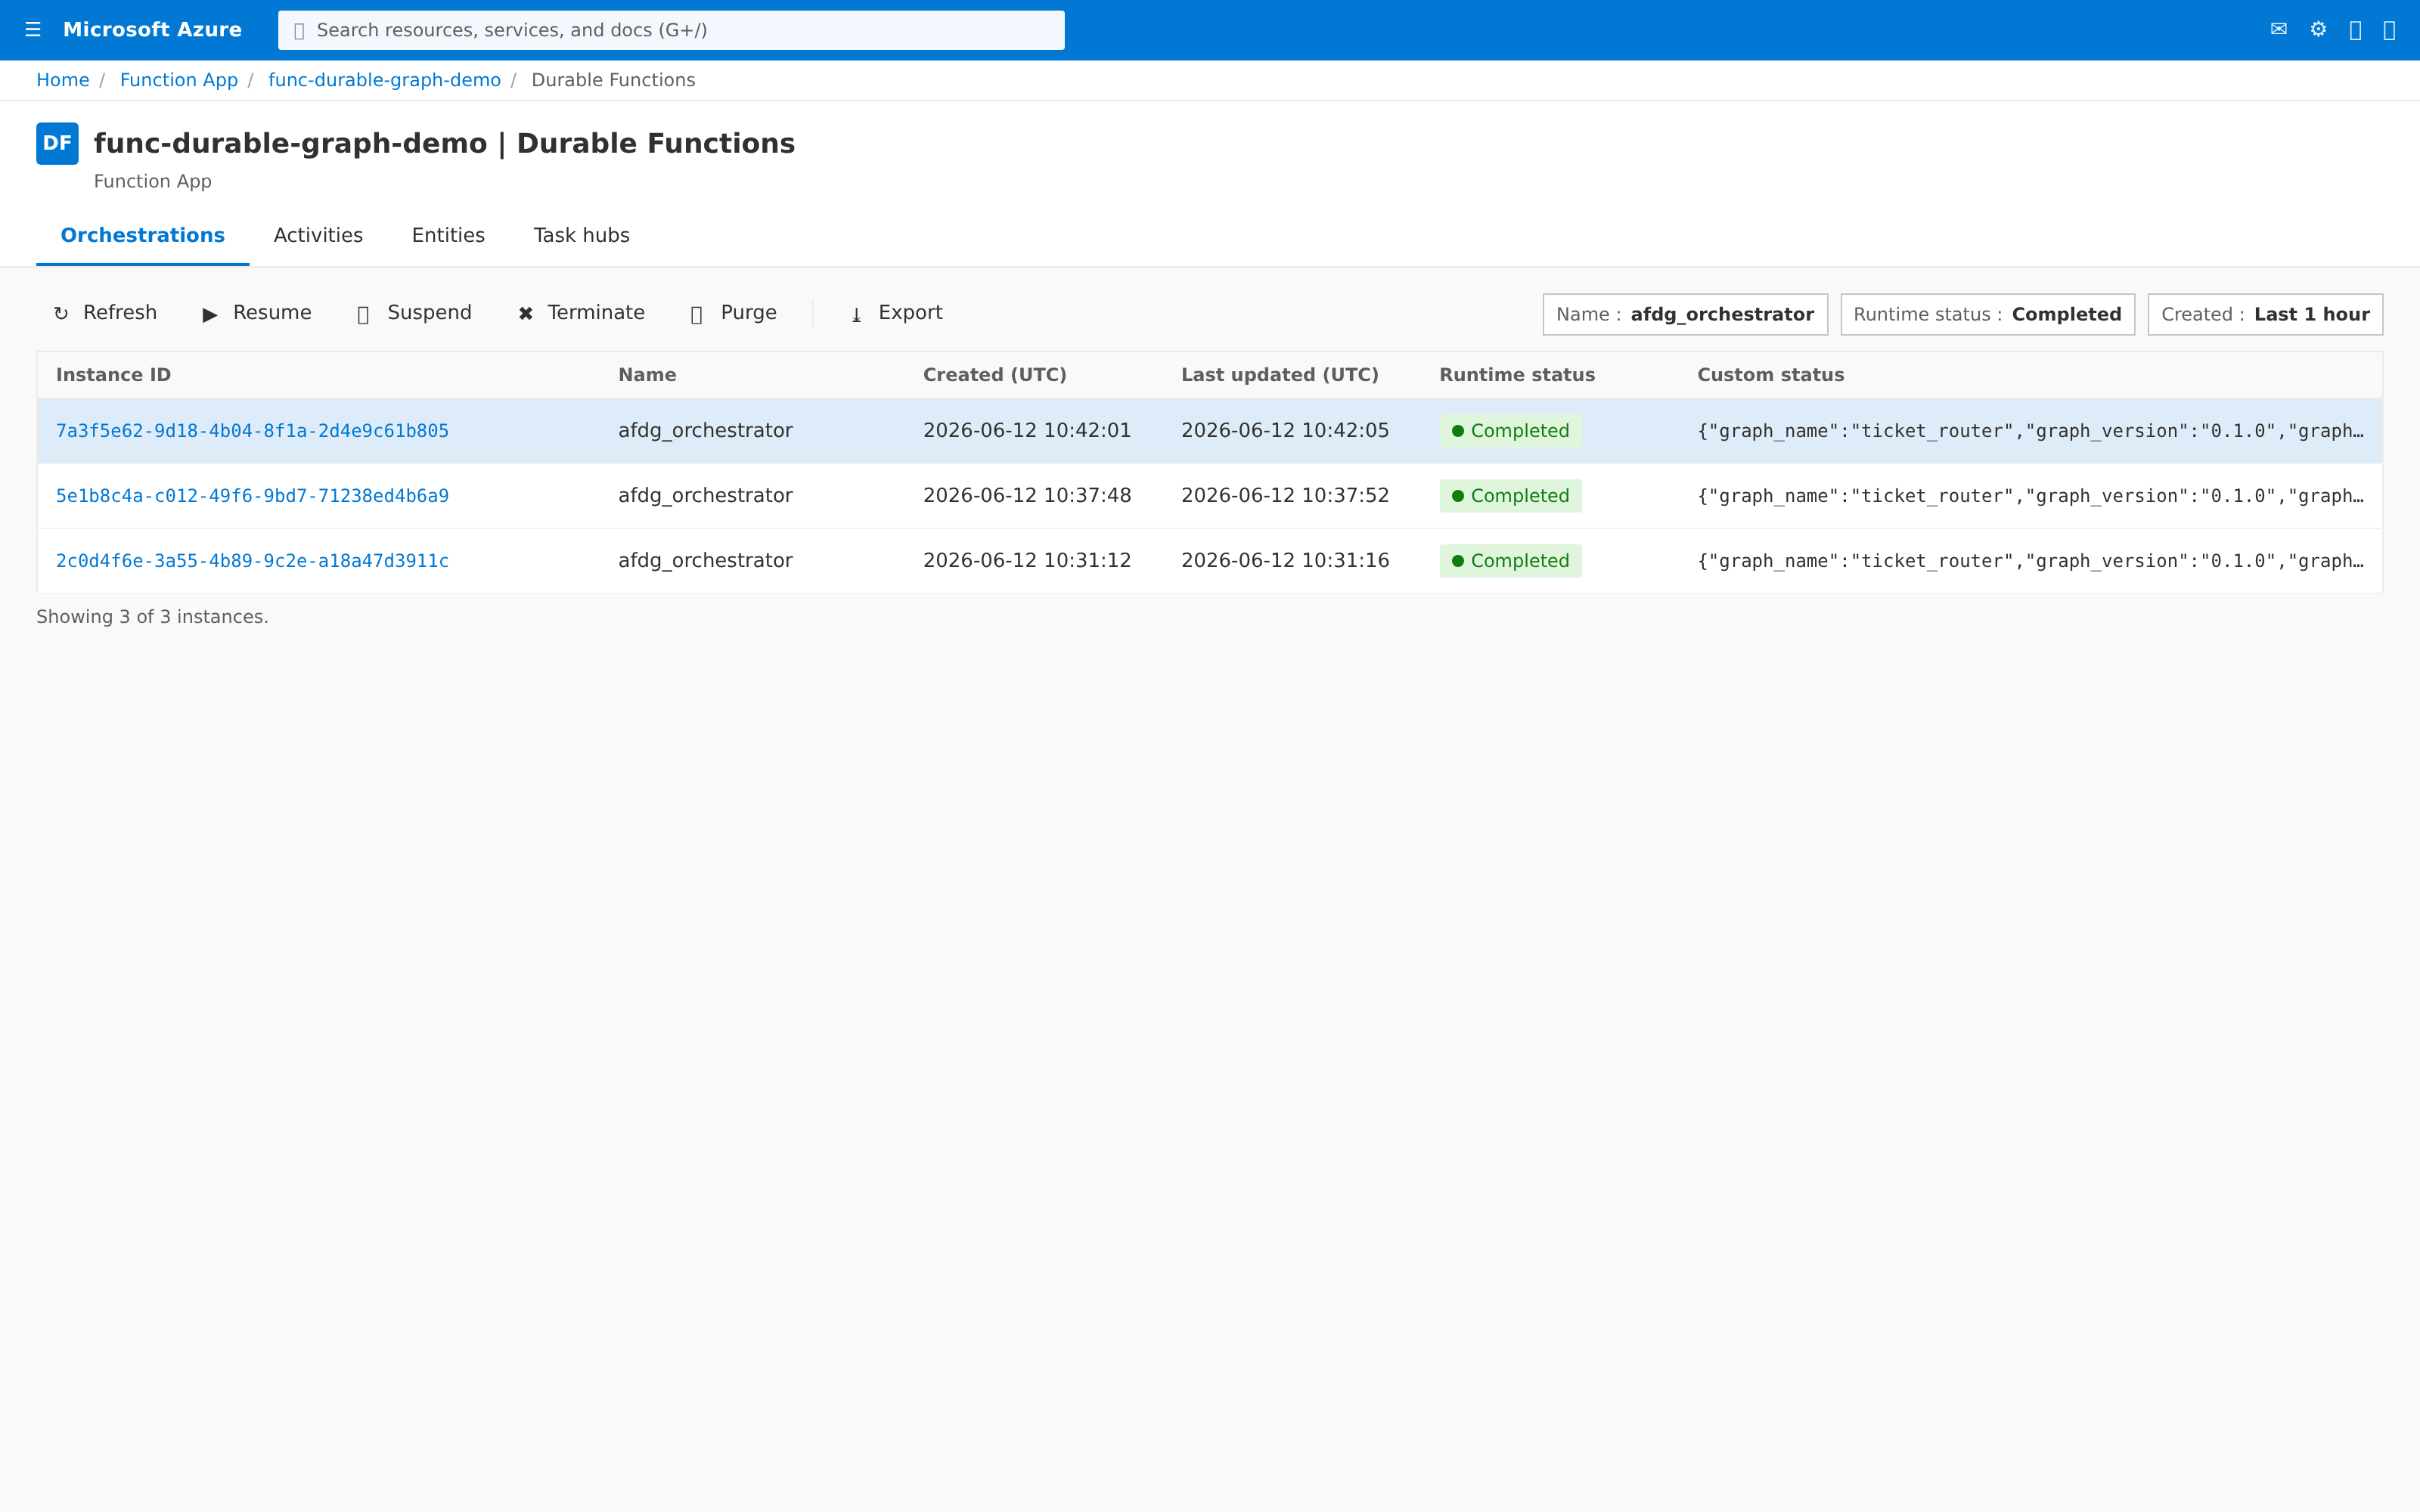
Once your Function App is deployed to Azure, the same graph runs appear in the Durable Functions blade. This is the easiest way to confirm a deployment is healthy without pulling logs.
In the Orchestrations tab, every graph run shows up as an
afdg_orchestrator instance. The Custom status column holds the JSON
dictionary that the orchestrator sets after every step
(graph_name, graph_version, graph_hash, current_node), so you can see
at a glance which graph each instance is running and where it is.
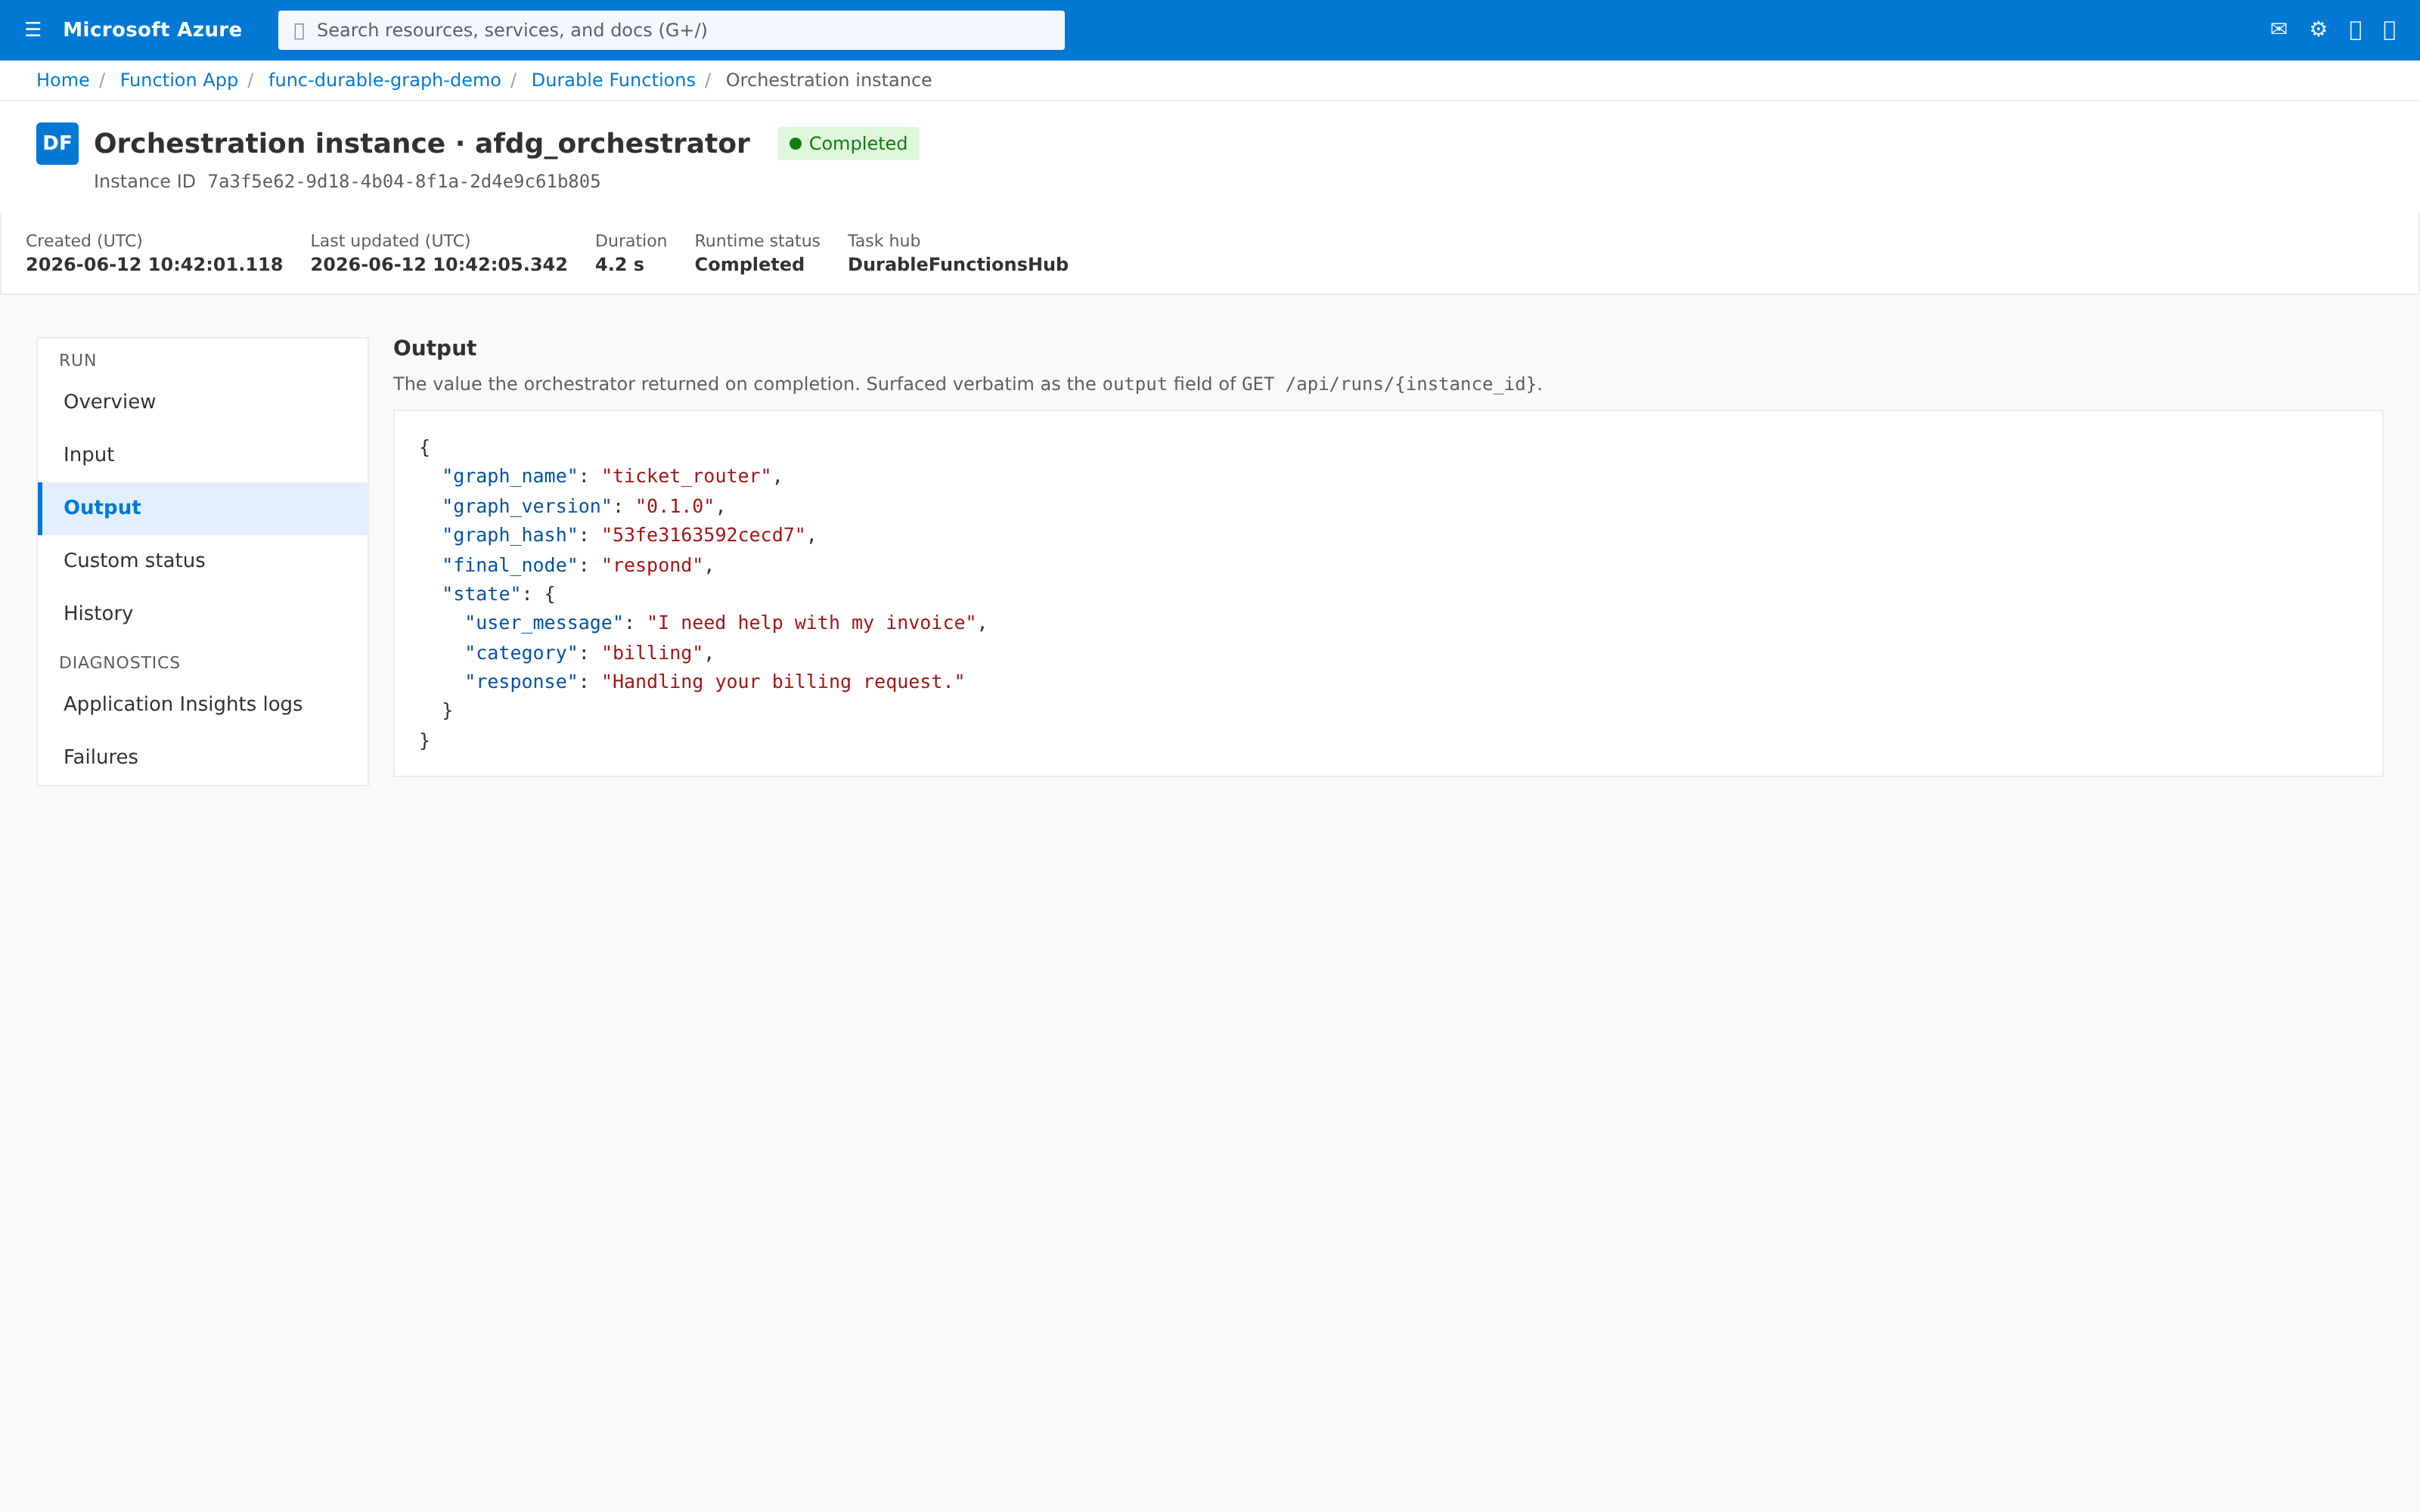
Drilling into an instance reveals the orchestrator Output — the value
returned by afdg_orchestrator on completion, with top-level fields
graph_name, graph_version, graph_hash, final_node, and state.
This same value is surfaced verbatim as the output field of
GET /api/runs/{instance_id}.
Note
These screenshots show the Azure Portal Durable Functions blade for a
deployed Function App. You do not need to deploy to follow this quickstart
— func start and the curl flow above are enough for local development.
Next steps
- Read Configuration to learn all
ManifestBuilderoptions. - Read Usage for advanced patterns like conditional routing and events.
- Explore the Support Agent Example.
- Check API Reference for complete signatures.